When I first started working in Power Automate, I didn’t know how to see what dynamic content an action produced and what the values would look like. That’s why this post explains simple steps to understand the dynamic content in Power Automate.
What is Dynamic Content?
If you are new to Power Automate, you might not be familiar with dynamic content. What is it exactly? Well, dynamic content refers to data produced from a trigger or action. Subsequent actions in the flow use the data.
- Both triggers and actions can produce dynamic content.
- Both triggers and actions can use dynamic content.
- Dynamic content works anywhere in the flow after creation.
Where Is Dynamic Content in Power Automate?
Users access dynamic content from the blue Add dynamic content link. You must click inside the action for the blue hyperlink to appear. Then, both the Add dynamic content link and the menu pop up.
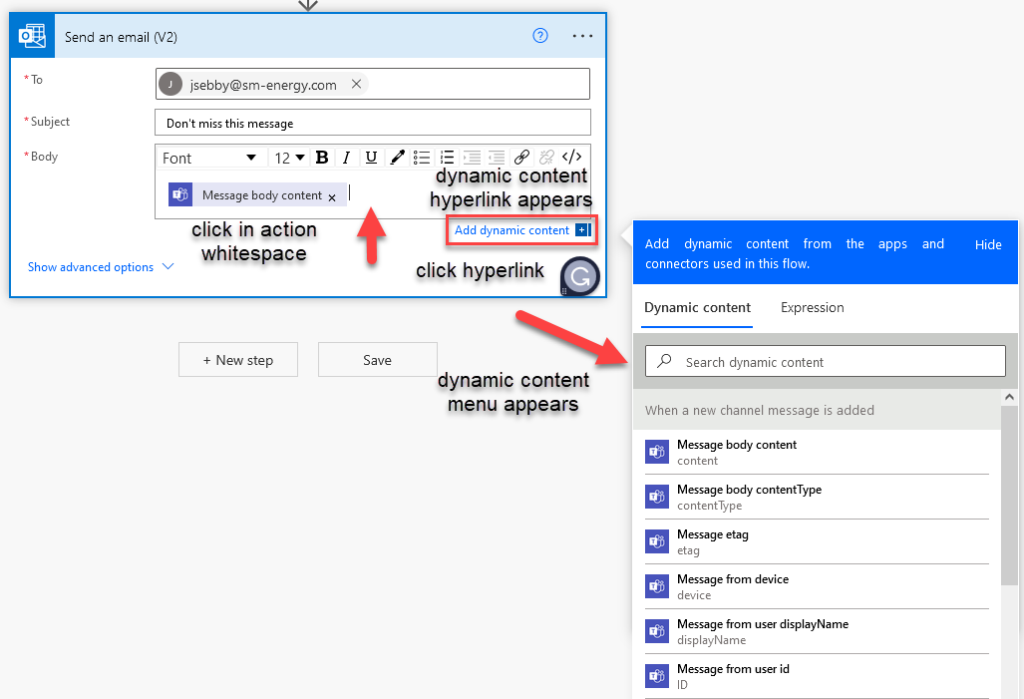
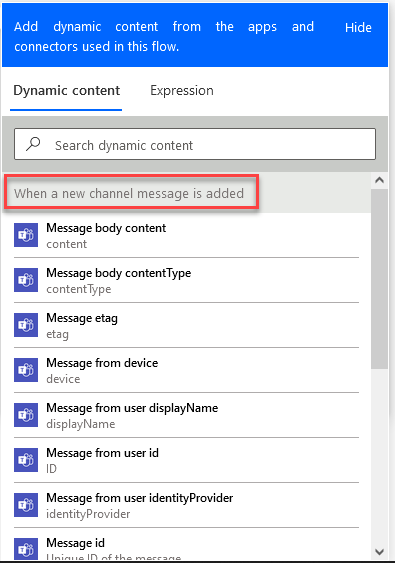
Dynamic content appears under a header equal to the name of the action that generated it.
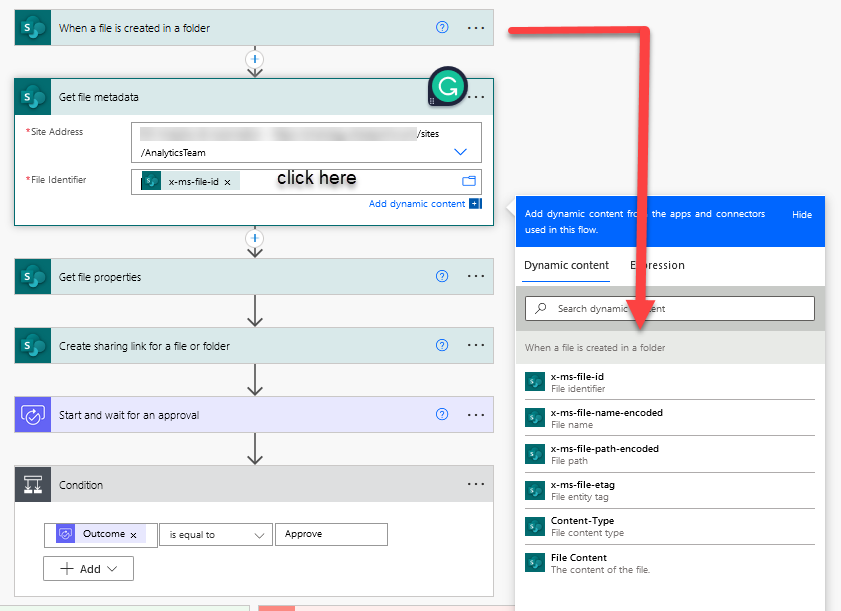
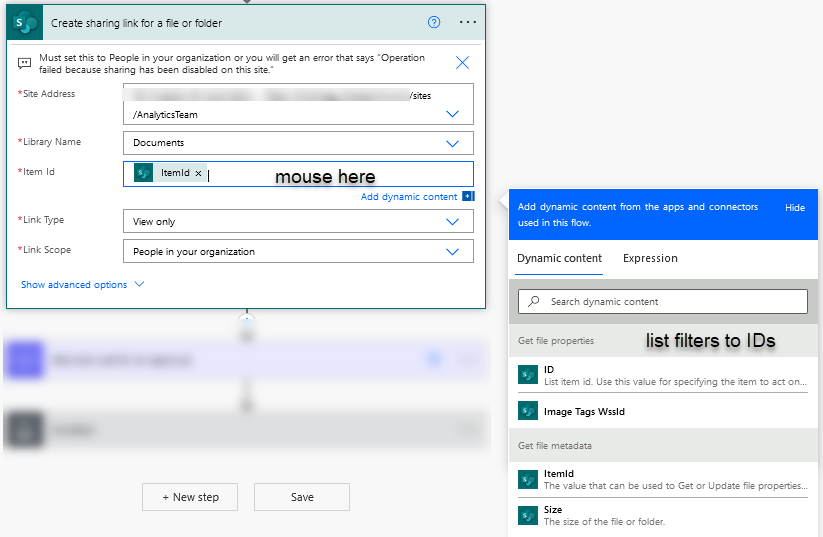
Dynamic content for a given action can only be viewed after the step that created it. For example, the dynamic content for the When a file is created in a folder action only appears when you click in Get file metadata or actions farther down the flow. In this screenshot, I have clicked inside the Get file metadata action. The only dynamic content available is for the trigger above it. To see dynamic content for the Get file properties action, the user would need to click on Create sharing link for file or folder action or a lower action.
Now, this only shows you the name of the dynamic content and not the value(s). But, you probably need the values to know how to configure the right dynamic content. So, how do you get the values?
Dynamic Content After Testing
The best way to see dynamic content values is to configure actions with your best guess, run the flow, and inspect the output. Upon completion, all dynamic content values appear in flow outputs. For example, the Approvals action Start and wait for an approval contains 3 pieces of dynamic content that sound similar – Response summary, Outcome, and Responses. You might not know which one to use. But, after running the flow, I can see the differences between them.
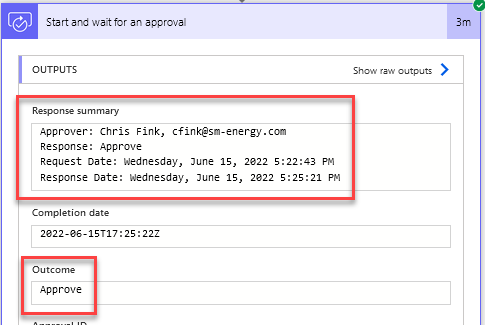
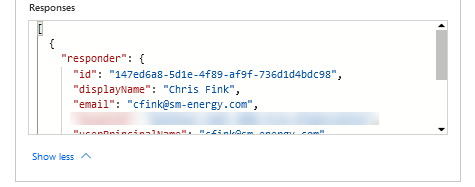
Based on the values shown in outputs, I now have a much better understanding of which of these 3 is the best choice for my configuration.
Here’s another example using the SharePoint action Get file meta data. If I didn’t know the difference between Name and DisplayName, a quick run of the flow and an inspection of outputs shows me they are the same.
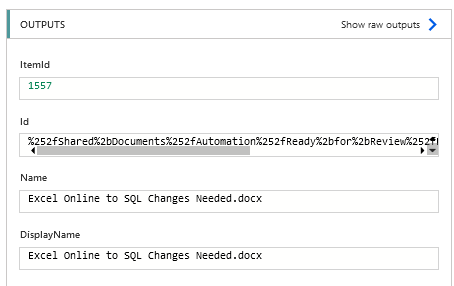
Now you know how to decipher dynamic content in Power Automate. Check out other posts in my Learning Power Automate Series.
Pingback: Create An Approval Flow in Power Automate » The Analytics Corner
Pingback: How to Update Excel with Power Automate » The Analytics Corner
Pingback: Working with Microsoft Forms in Power Automate » The Analytics Corner
Pingback: 3 Things to Know About Processing Email in Power Automate » The Analytics Corner
Pingback: SharePoint Site Missing in Power Automate » The Analytics Corner