Many of the automation solutions we build incorporate Alteryx with Power Automate and Power Automate desktop. In many cases, we read and write to and from SharePoint lists. However, as you might know, the ODATA query is pretty slow, and you can’t refine the query in Alteryx. This post explains how to attack these two problems to make sure you get the right data as quickly as possible. Read on to learn more about SharePoint tools in Alteryx.
My Use Case
We automated the new Vendor setup process for our Land department using Power Automate and Power Automate Desktop. Data moves from a spreadsheet into a SharePoint form, and it works well. Submitting the SharePoint form kicks off other processes, and more data gets shuffled around. Then, we have an Alteryx workflow that runs at night to pick up new data entered in SharePoint as part of these child processes and puts it into a spreadsheet.
Now, this process is an old one. It’s been humming along both manually and in an automated form since 2014. This means the SharePoint list is huge. We are talking thousands of records. As a result, 2 problems popped up that needed to be solved.
- Querying all the records creates a super slow workflow. My Alteryx workflow ran for 30 min before I killed it knowing that was not acceptable.
- You can limit the records pulled via the SharePoint tool, but it doesn’t pull from the top of the list. I asked it for 500 records and got data from 2014 – 2021.
So, how do we fix these problems and make the workflow more efficient? Let’s start with the tool config.
SharePoint List Input Tool
Configuring SharePoint tools in Alteryx is straightforward. Choose your version of SharePoint and enter credentials. Then, tell it which List and View to pull from. Providing a Record Limit is optional but recommended, especially as the size of the list grows.

Now, the key to getting the right data is the SharePoint View. You need to create a sorted View in SharePoint and point Alteryx to that view with a record limit in the tool config to ensure you get the right data. I’ll show you how to do this in SharePoint.
Views in SharePoint
SharePoint comes in two flavors – On-Premise and Cloud. I’ll show both of them.
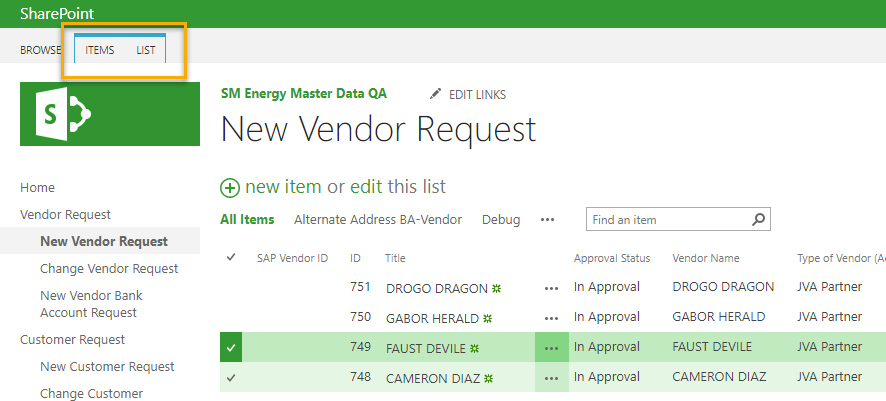
On-Prem looks like this, with 2 tabs above the list in the top left-hand corner of the screen.

Go to the List tab and find List Settings.

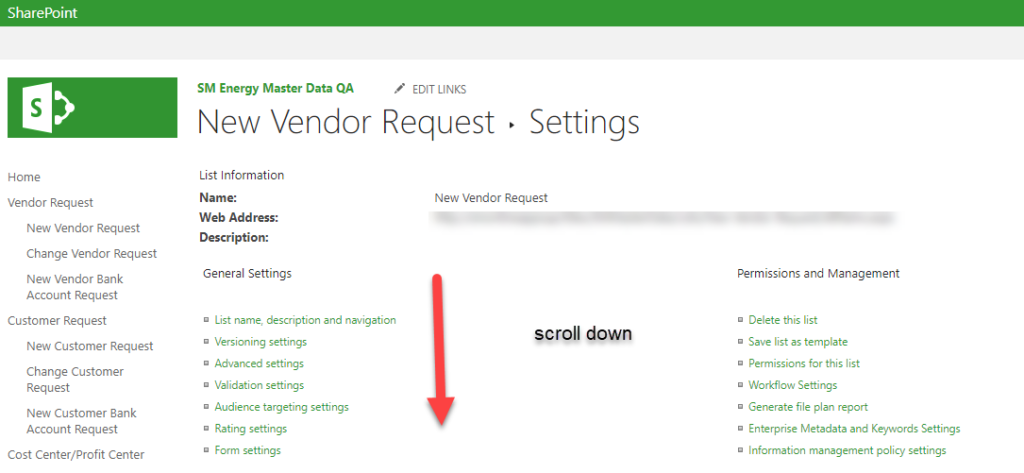
Now, you should be at this screen. Scroll down….waaaaay down. And keep scrolling down in this post. My next screenshot is SharePoint cloud, but then On-Prem and Cloud look the same, so keep scrolling down this post.

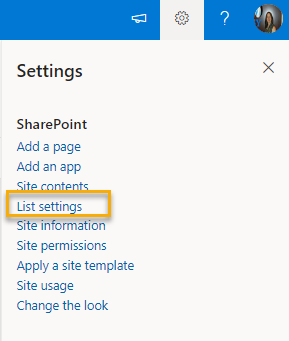
If you are using SharePoint cloud, go to the list, click the cog icon in the top right-hand corner of the screen and select List settings.


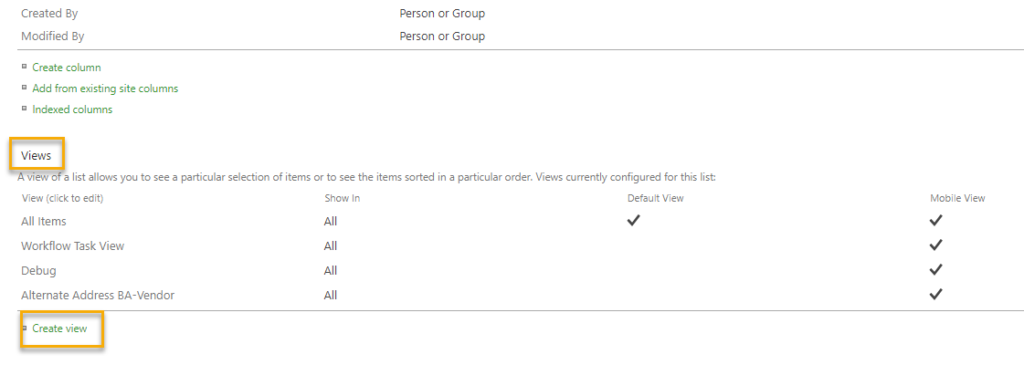
From this point, On-Prem and Cloud look very similar. You are looking for a section called Views where you can create a View.

Create the View, select which columns should be part of it, and then scroll down the screen some more. Now, you are looking for the Sort section where you can apply one or more columns of Sorting to the View.

The next step is to update the Alteryx SharePoint tool config with the new View. I also recommend adding a Record Limit. And, there are a couple of things I want to warn you about.
Caveats
I’ve reached out to Alteryx support to see if there is any way to update faster. I’ll provide an update if I get one.
Conclusion
And now you know how to get the data you need as quickly as possible. Thanks for reading my post about using SharePoint tools in Alteryx.