My Learning Power Automate series is coming to a close, and the last thing we are investigating is the power of Power Automate on mobile. I was searching the Templates section of Power Automate for inspiration, and I found a template with a manual trigger to send a notice to your coworkers that you were out sick. So, you might wake up one morning and feel like death. All you have to do is grab your phone, make a few clicks, and you can go back to sleep. That’s pretty cool right? Well, I made it even better with a few tweaks. Read on to learn more about Power Automate on mobile.
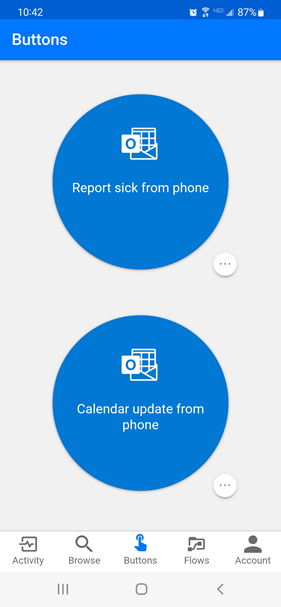
Building out this flow was my first experience with Power Automate on mobile. Installing the app and signing in on my Android device took less than two minutes. It was very simple. Any flow setup with a manual trigger appears in the Buttons section of the app. And, after you kick off a flow, you can see its success or failure in the Activity screen.
The Original
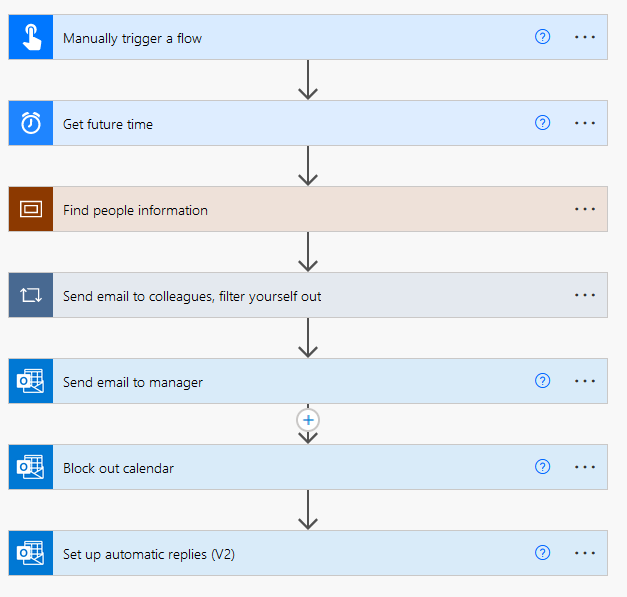
The original flow I found in templates looked like this. The trigger was a simple push button trigger. It gets some information about your manager and coworkers, sends an email, creates a calendar event, and sends a push notification. It was intended to be used with Power Automate on mobile.

New & Improved
After working with the flow for a bit, I decided the flow would be better with the following modifications.
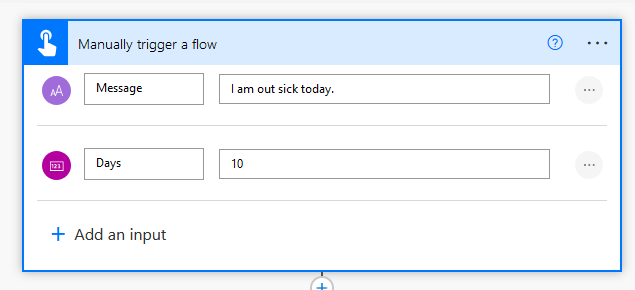
- Add 2 inputs to the trigger. One is a text input that allows the user to specify a message or reason for their out-of-office. The second input is a number that corresponds to the number of days the user will be out of the office.
- Add a Get future time action to calculate an end date for the out of office.
- Add a condition to filter myself out of the emails sent to my manager’s direct reports.
- Add an email to be sent to my manager.
- Add an automatic email reply.
- Removed the push notification.
See below for the details of each step in the flow.
Flow Details
Manual Trigger
There are many reasons someone might want to use this flow, not just that they are out sick. I can’t tell you how many times I’ve rushed to get out the door for vacation and forgot to set up my out-of-office. By adding 2 manual inputs, I can use my phone to set up the out-of-office and tell people I am away for any reason without reopening my laptop.
Get Future Time
There are a lot of different ways to work with date and time in Power Automate. The Date Time category of actions is one of the easiest because you don’t have to write expressions. I simply configured the Interval with the dynamic content from the trigger and specified that it was a Day.

Scope
The next 3 actions sit within a Scope action. Scope is part of the Control category of actions and is more like a container than an action. It’s good for organizing actions and grouping actions. The next 3 actions are all part of the Office 365 User category of actions, which works with our active directory. They include….
- Get my profile
- Get manager
- Get direct reports
We need to get my profile to get dynamic content to provide to the Get manager action. Then, we will use dynamic content from Get manager to get my manager’s direct reports. Note, Get my profile is a different action from Get user profile. When using the Get my profile action, no configuration is necessary. Power Automate knows who logged in.

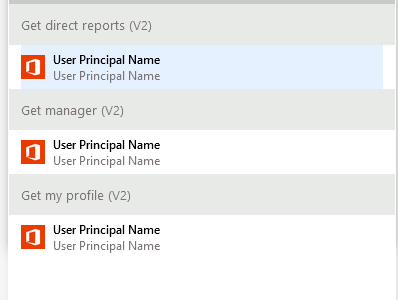
When configuring Get manager and Get direct reports, both actions are configured with the User Principal Name. Just be careful which one you select. It is very easy to choose the wrong one. Get manager needs to use the User Principal Name from Get my profile because we want to get my manager. Get direct reports uses the User Principal Name from Get manager because we are getting the direct reports for that manager.
Email Colleagues
The next step is to email my colleagues (my manager’s direct reports) to let them know I will be out of the office. But, remember, I am one of my manager’s direct reports. And, I don’t really need to get an email tell me I am out of the office, so we add a condition to filter me out of my manager’s direct reports. Don’t worry about adding the apply to each step. Just add the condition. As soon as you enter the Mail dynamic content from the Get direct reports step, Power Automate will add the apply to each. The second Mail after “is equal to” is the Mail dynamic content from Get my profile. So, if the email address of a direct report is equal to my email address, don’t do anything. If it isnt, send an email.
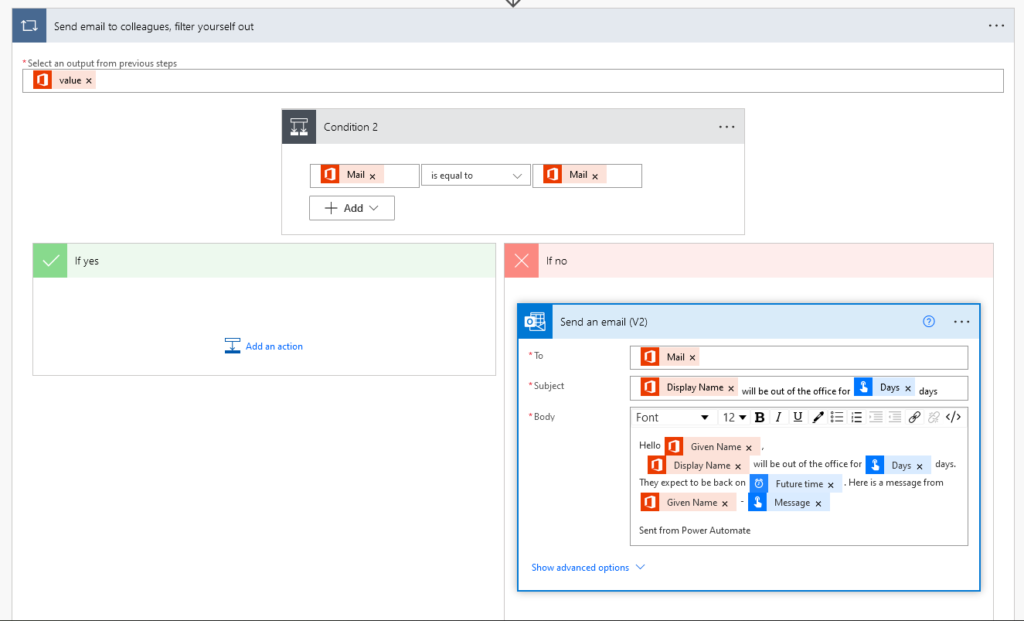
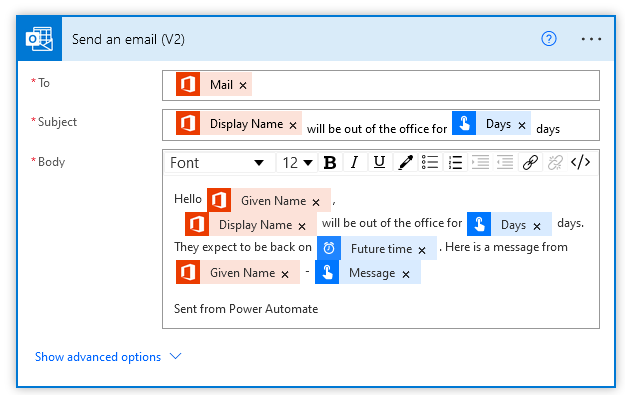
In the email config, make sure to use the Mail dynamic content from Get direct reports in the To field. You can configure the email message however you want. The Office 365 User actions we used provide a lot of information about people. I have chosen to use Display Name (a person’s full name) and the Given Name (a person’s first name). The bulleted list explains where each piece of content came from.
- Mail – from the Get direct reports action
- Display Name – from the Get my profile action
- Days – from the trigger
- Given Name – from the Get direct reports action
- Display Name – from the Get my profile action
- Days – from the trigger
- Future time – from the Future Time action
- Given Name – from the Get my profile action
- Message – from the trigger
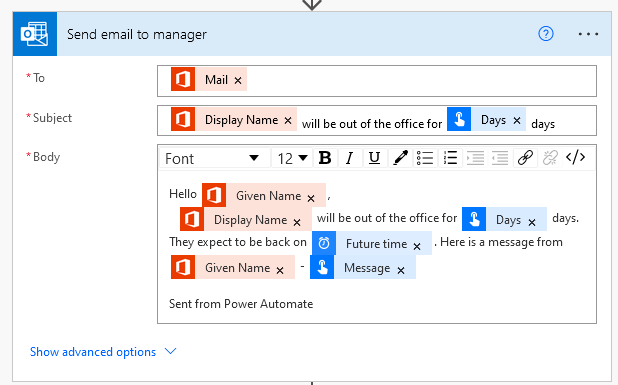
Send Email to Manager
Next, we send an email to my manager, which looks very similar. The bulleted list explains where each piece of content came from. I highlighted the differences from above.
- Mail – from the Get manager action
- Display Name – from the Get my profile action
- Days – from the trigger
- Given Name – from the Get manager action
- Display Name – from the Get my profile action
- Days – from the trigger
- Future time – from the Future Time action
- Given Name – from the Get my profile action
- Message – from the trigger
Block Calendar
Next, we want to block out my calendar. The drop-down list should provide a list of some of the calendars you have access to. I was able to find my Outlook calendar in this list. Then, I set the subject of the out-of-office to the Message from my trigger. I used the Timestamp from my trigger to specify a start time. The Future Time corresponds to my end time.
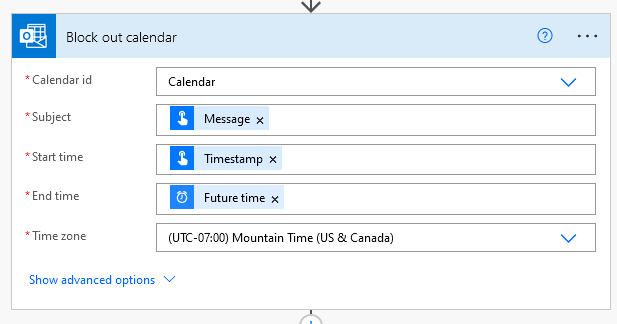
Note, in my first pass at this action, I used the Date from my trigger, not the Timestamp. However, if you want the out-of-office event to be precise, use Timestamp. If you don’t mind the calendar event being a little long, you can use the Date.
Setup Automatic Replies
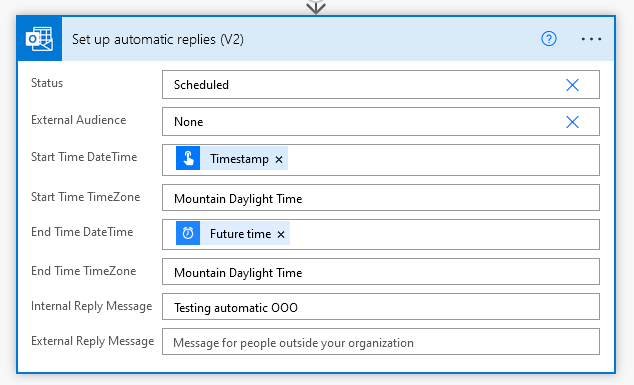
Lastly, I want to set up an out-of-office reply to emails that hit my inbox. The biggest source of frustration in this action is the time zone. Nowhere can I find a list of time zones Power Automate accepts. Videos I watched lamented the same thing. But, you can use Timezone dynamic content from earlier Outlook actions. That is how I derived that my timezone should be “Mountain Daylight Time”.
The status is Scheduled because we want it to start and end. For External Audience, you can choose None, Contacts, or All. None means no external reply. All means all external emails get a reply. Contacts mean that if you receive an email from an external address and it is in your contacts, Outlook will send an automatic reply.
I used the Timestamp from my trigger and the Future time from my Get future time action. This ensures my automatic reply and my calendar event are in sync.
Then, just leave a message. And, that’s it!
Before wrapping up, I want to note that I had an additional step right before Set up automatic replies. I had a step to look to see if an automatic reply was already turned on. If yes, do one thing. If no, do something else. I had a lot of trouble with this, and it will be the focus of a troubleshooting post coming out soon.
No Push Notification
Lastly, I want to note that I took the push notification out of the flow for two reasons. First, you can only see the push notification in the Power Automate app. It doesn’t show up with the rest of your notifications, which seems useless to me. Second, I assume the author of the template put the notification in there to let the user know the flow completed. That can easily be seen from the Activity screen without a notification that pops up and goes away, which you might miss anyway.
Conclusion
And now you know more about Power Automate on mobile devices. After completing this build, I reflected on the fact that there is probably a ton of work that we do from our laptops that we can outsource to Power Automate and trigger from our phones so that we don’t have to be tethered to the computer. Instead, we’ll just use the little mini-computer in our pocket.
Other Posts in the Learning Power Automate Series
- Getting Oriented with Power Automate
- Exploring Power Automate Triggers & Actions
- Building & Developing in Power Automate
- Troubleshooting in Power Automate
- Combatting File System Frustration in Power Automate
- What Can You Do With Office 365 Triggers in Power Automate?
- Two Reasons to Keep Tidy Connections in Power Automate
- How to Decipher Dynamic Content in Power Automate
- Create An Approval Flow in Power Automate
- Working with Microsoft Forms in Power Automate
- How to Update Excel with Power Automate
- 3 Things to Know About Processing Email in Power Automate
Pingback: What is UTC and why is it important in Power Automate? » The Analytics Corner